Why Grow Cotton at Home? Benefits and Uses
Growing cotton at home can be a fun and rewarding gardening project, whether you’re interested in cultivating your own cotton for personal use or simply as a decorative plant. Cotton is relatively easy to grow in warm climates and provides a fascinating look at how an essential crop is produced, starting from a tiny seed and ending with the fluffy cotton fibers we use in textiles.
Homegrown cotton has several potential uses. Many gardeners grow cotton for crafting, as the cotton bolls can be used for decoration, DIY projects, or small-scale textile production. Additionally, if you enjoy sustainable living, growing your own cotton allows you to produce a renewable material right in your backyard, reducing the need for store-bought cotton products.
Cotton plants are also ornamental. Their tall, upright stems and attractive, fluffy bolls make them a unique addition to any home garden. Whether you’re interested in using the cotton fibers or simply want to enjoy the beauty of the plants, growing cotton at home is a great way to learn about agriculture and sustainability.
Choosing the Right Cotton Seeds for Home Gardening
Choosing the right type of cotton seed is essential for a successful home garden. There are several varieties of cotton that you can grow, each with its own characteristics:
- Upland Cotton: This is the most common variety grown worldwide and is known for its adaptability. Upland cotton is a great choice for beginners, as it thrives in a variety of climates and soil conditions.
- Pima Cotton: Pima cotton is known for its longer fibers and higher quality. It’s typically grown in hot, dry climates, so if you live in a warm region, this variety can be a great option.
- Organic Cotton: If you’re interested in sustainable and eco-friendly gardening, organic cotton seeds are a great choice. These seeds are non-GMO and are grown without synthetic pesticides or fertilizers.
When selecting cotton seeds, make sure to choose seeds that are suited to your region’s climate. Cotton requires a long, warm growing season, so if you live in a cooler climate with a short summer, consider starting the seeds indoors before transplanting them outside. Additionally, choose high-quality seeds from reputable suppliers to ensure a higher germination rate and healthier plants.
Preparing the Soil for Growing Cotton at Home
Proper soil preparation is crucial when growing cotton at home. Cotton thrives in well-drained, loamy soil that is rich in organic matter. Before planting, you’ll need to prepare the soil to ensure it has the right texture, pH level, and nutrient content for cotton growth.
- Test the Soil pH: Cotton prefers a slightly acidic to neutral soil with a pH level between 6.0 and 7.5. You can test your soil’s pH using a home testing kit or send a sample to a local agricultural extension service. If your soil is too acidic, adding lime can help raise the pH. If it’s too alkaline, adding sulfur or organic matter can help lower the pH.
- Amend the Soil with Organic Matter: Cotton plants benefit from soil that is rich in organic matter, as it improves soil structure and enhances moisture retention. Add compost, well-rotted manure, or other organic materials to the soil to provide essential nutrients and improve drainage.
- Ensure Proper Drainage: Cotton seeds are susceptible to root rot in poorly drained soils. If your soil is heavy or clay-like, consider adding sand or organic matter to improve drainage. You can also plant cotton in raised beds to ensure that excess water drains away from the roots.
By preparing the soil correctly, you’ll create an environment that promotes strong root growth and healthy cotton plants, ensuring a successful harvest.
Best Time to Plant Cotton Seeds at Home
Timing is critical when planting cotton seeds at home. Cotton is a warm-season crop, which means it needs warm soil and air temperatures to germinate and grow. The best time to plant cotton seeds is in the spring, once all danger of frost has passed and the soil temperature consistently reaches at least 60°F (15°C).
If you live in a region with a long, hot growing season, you can plant cotton seeds directly in the garden once the soil has warmed up. However, if you live in an area with a shorter growing season, you may want to start the seeds indoors 4 to 6 weeks before the last frost date. This will give the plants a head start and allow you to transplant them outdoors when the weather is warm enough.
When planting outdoors, it’s important to wait until the nighttime temperatures are consistently above 50°F (10°C). Planting cotton seeds too early, while the soil is still cold, can lead to poor germination and weak seedlings. By timing your planting correctly, you’ll give your cotton plants the best chance to thrive and produce a bountiful harvest.
Step by Step Guide to Planting Cotton Seeds Indoors and Outdoors
Whether you choose to start your cotton seeds indoors or plant them directly in the garden, following these steps will help ensure successful germination and healthy plant growth.
Planting Indoors:
- Fill Seed Trays or Pots: Use seed trays or small pots filled with a light, well-draining seed-starting mix. Avoid heavy soils, as they can hold too much moisture and cause the seeds to rot.
- Plant the Seeds: Plant the cotton seeds about 1 inch deep and 4 to 6 inches apart. Gently press the soil over the seeds and water them lightly.
- Provide Warmth and Light: Place the seed trays in a warm, sunny location or use grow lights. Cotton seeds need warmth to germinate, so keeping the trays in an area with temperatures between 70°F and 85°F (21°C to 29°C) will promote faster sprouting.
- Transplanting: Once the seedlings have developed their first set of true leaves and the outdoor temperatures are consistently warm, transplant them into the garden, spacing them about 12 to 18 inches apart.
Planting Outdoors:
- Prepare the Soil: Till the soil to a depth of 8 to 10 inches, ensuring it is loose and well-drained. Amend the soil with compost or organic matter for added nutrients.
- Sow the Seeds: Plant the cotton seeds directly in the garden, about 1 inch deep and spaced 4 to 6 inches apart in rows that are at least 30 inches apart. Water the area gently after planting.
- Monitor the Soil: Keep the soil moist but not waterlogged during the germination period, which typically takes 5 to 10 days.
Following these steps will help you successfully plant cotton seeds indoors or outdoors and set the stage for healthy growth.
How to Care for Cotton Plants at Home Watering and Fertilization
Once your cotton seeds have germinated and the plants are established, proper care is essential to ensure healthy growth and a successful harvest. Cotton plants require regular watering and fertilization to thrive.
Watering: Cotton plants prefer consistent moisture but do not tolerate waterlogged soil. Water your plants deeply once or twice a week, depending on the weather and soil conditions. In hot, dry climates, you may need to water more frequently to keep the soil moist. Be sure to water at the base of the plants to avoid wetting the leaves, as this can lead to fungal diseases.
Fertilization: Cotton plants are heavy feeders and require a nutrient-rich soil to produce strong growth and high-quality bolls. Apply a balanced fertilizer (such as 10-10-10) every 3 to 4 weeks during the growing season. You can also add compost or organic matter to the soil to provide a steady release of nutrients.
As the plants begin to flower, switch to a fertilizer that is higher in phosphorus and potassium to encourage boll development. Be careful not to over-fertilize, as excessive nitrogen can lead to too much leafy growth at the expense of cotton production.
Managing Pests and Diseases in Homegrown Cotton
Like any other garden plant, cotton is susceptible to pests and diseases. Common pests that may affect cotton plants include aphids, bollworms, and spider mites. These pests can damage the plants by feeding on the leaves, stems, or bolls, reducing the overall yield.
Pest Management:
- Aphids: These small insects feed on the sap of cotton plants, causing leaves to curl and stunt growth. Use insecticidal soap or neem oil to control aphid infestations.
- Bollworms: These caterpillars feed on the developing cotton bolls, reducing the quality of the cotton fibers. Handpick the caterpillars or use organic pest control methods like Bt (Bacillus thuringiensis).
- Spider Mites: These tiny pests can cause yellowing and wilting of the leaves. Increase humidity around the plants or use a miticide if the infestation is severe.
Disease Management:
- Root Rot: Overwatering or poorly drained soil can lead to root rot, which causes the roots to decay. Avoid overwatering and ensure the soil is well-drained to prevent this disease.
- Leaf Spot: Fungal diseases like leaf spot can affect cotton plants, causing brown or yellow spots on the leaves. Remove infected leaves and apply a fungicide if necessary.
By monitoring your plants regularly and taking preventive measures, you can keep pests and diseases under control and ensure a healthy cotton crop.
How Long Does It Take to Grow Cotton at Home?
The time it takes to grow cotton at home depends on several factors, including the variety of cotton, climate, and growing conditions. On average, cotton plants take between 5 to 6 months from planting to harvest. After germination, the plants will grow steadily, producing their first flowers within 60 to 90 days. These flowers eventually develop into bolls, which contain the cotton fibers.
Once the bolls appear, it takes another 50 to 60 days for them to mature and split open, revealing the cotton fibers inside. The total time from planting to harvest is typically 150 to 180 days, depending on the growing conditions.
During this time, it’s important to continue caring for your plants by providing water, fertilizer, and protection from pests and diseases. By maintaining consistent care, you’ll ensure that your cotton plants grow strong and healthy, producing a bountiful harvest.
Harvesting Cotton at Home When and How to Pick Cotton
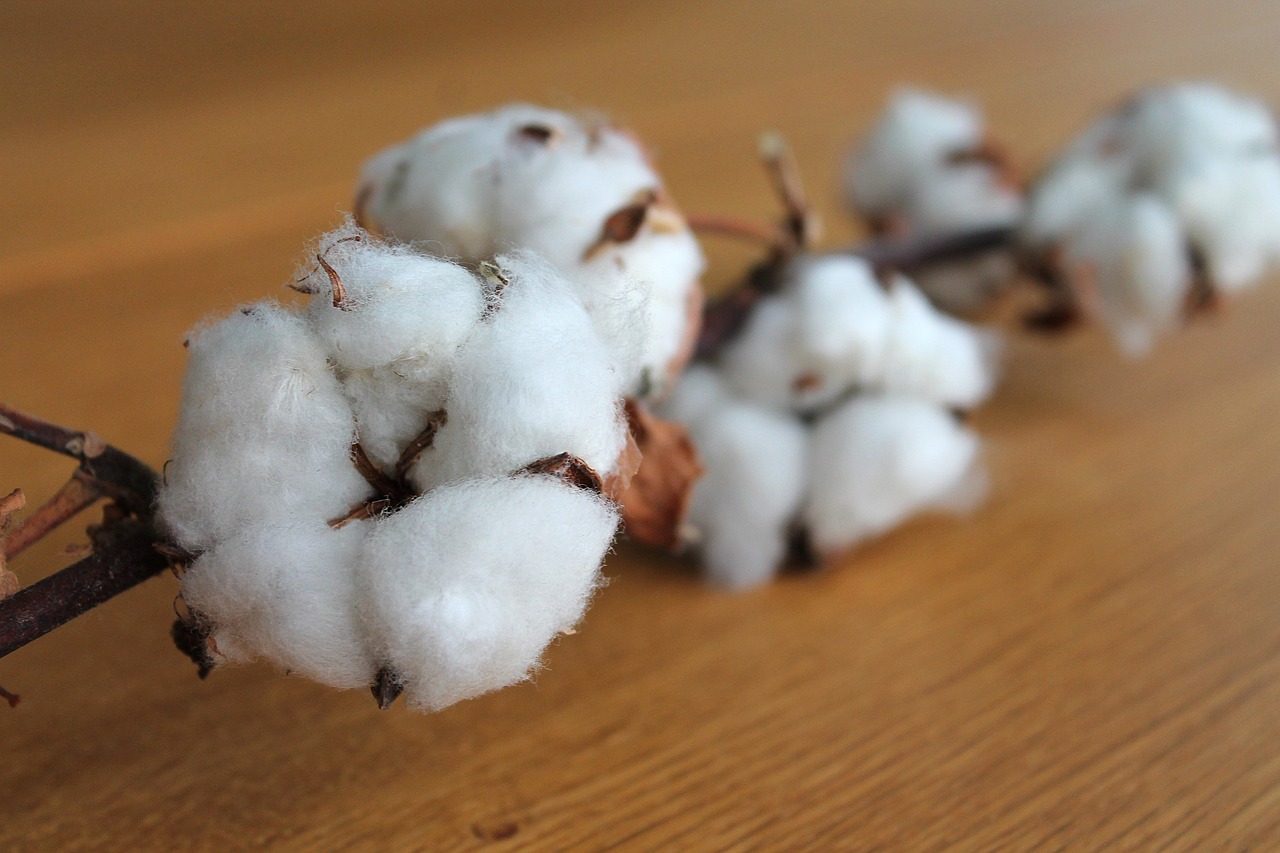
Harvesting cotton is the most rewarding part of the growing process. You’ll know your cotton is ready to be picked when the bolls split open and reveal the fluffy, white fibers inside. This typically occurs around 5 to 6 months after planting, once the bolls have fully matured.
To harvest cotton, simply pull the fibers from the open bolls by hand. Be sure to wear gloves, as the bolls can be sharp and may cause irritation. It’s important to pick the cotton before rain or high humidity can affect the quality of the fibers.
After harvesting, you can use the cotton fibers for various purposes, such as crafting or small-scale textile production. The seeds inside the bolls can be saved for future planting or used to produce cottonseed oil.
Uses of Homegrown Cotton From Crafting to Textiles
Once you’ve harvested your homegrown cotton, there are many ways to use the fibers. One of the most popular uses is in crafting, where the cotton bolls can be incorporated into wreaths, centerpieces, or other decorative items. You can also spin the cotton fibers into yarn for knitting, weaving, or other textile projects.
If you’re interested in making your own clothing or household textiles, homegrown cotton can be used to produce small-scale fabric. While producing enough cotton for large-scale projects can be challenging in a home garden, the cotton you grow can still be used for personal crafting or learning about the textile production process.
Whether you use the cotton for decorative purposes, crafting, or creating textiles, growing cotton at home offers a unique and educational experience that connects you to the process of fiber production.